Chasing Totality Over Segovia: Building a 14mm Solar Eclipse Composite
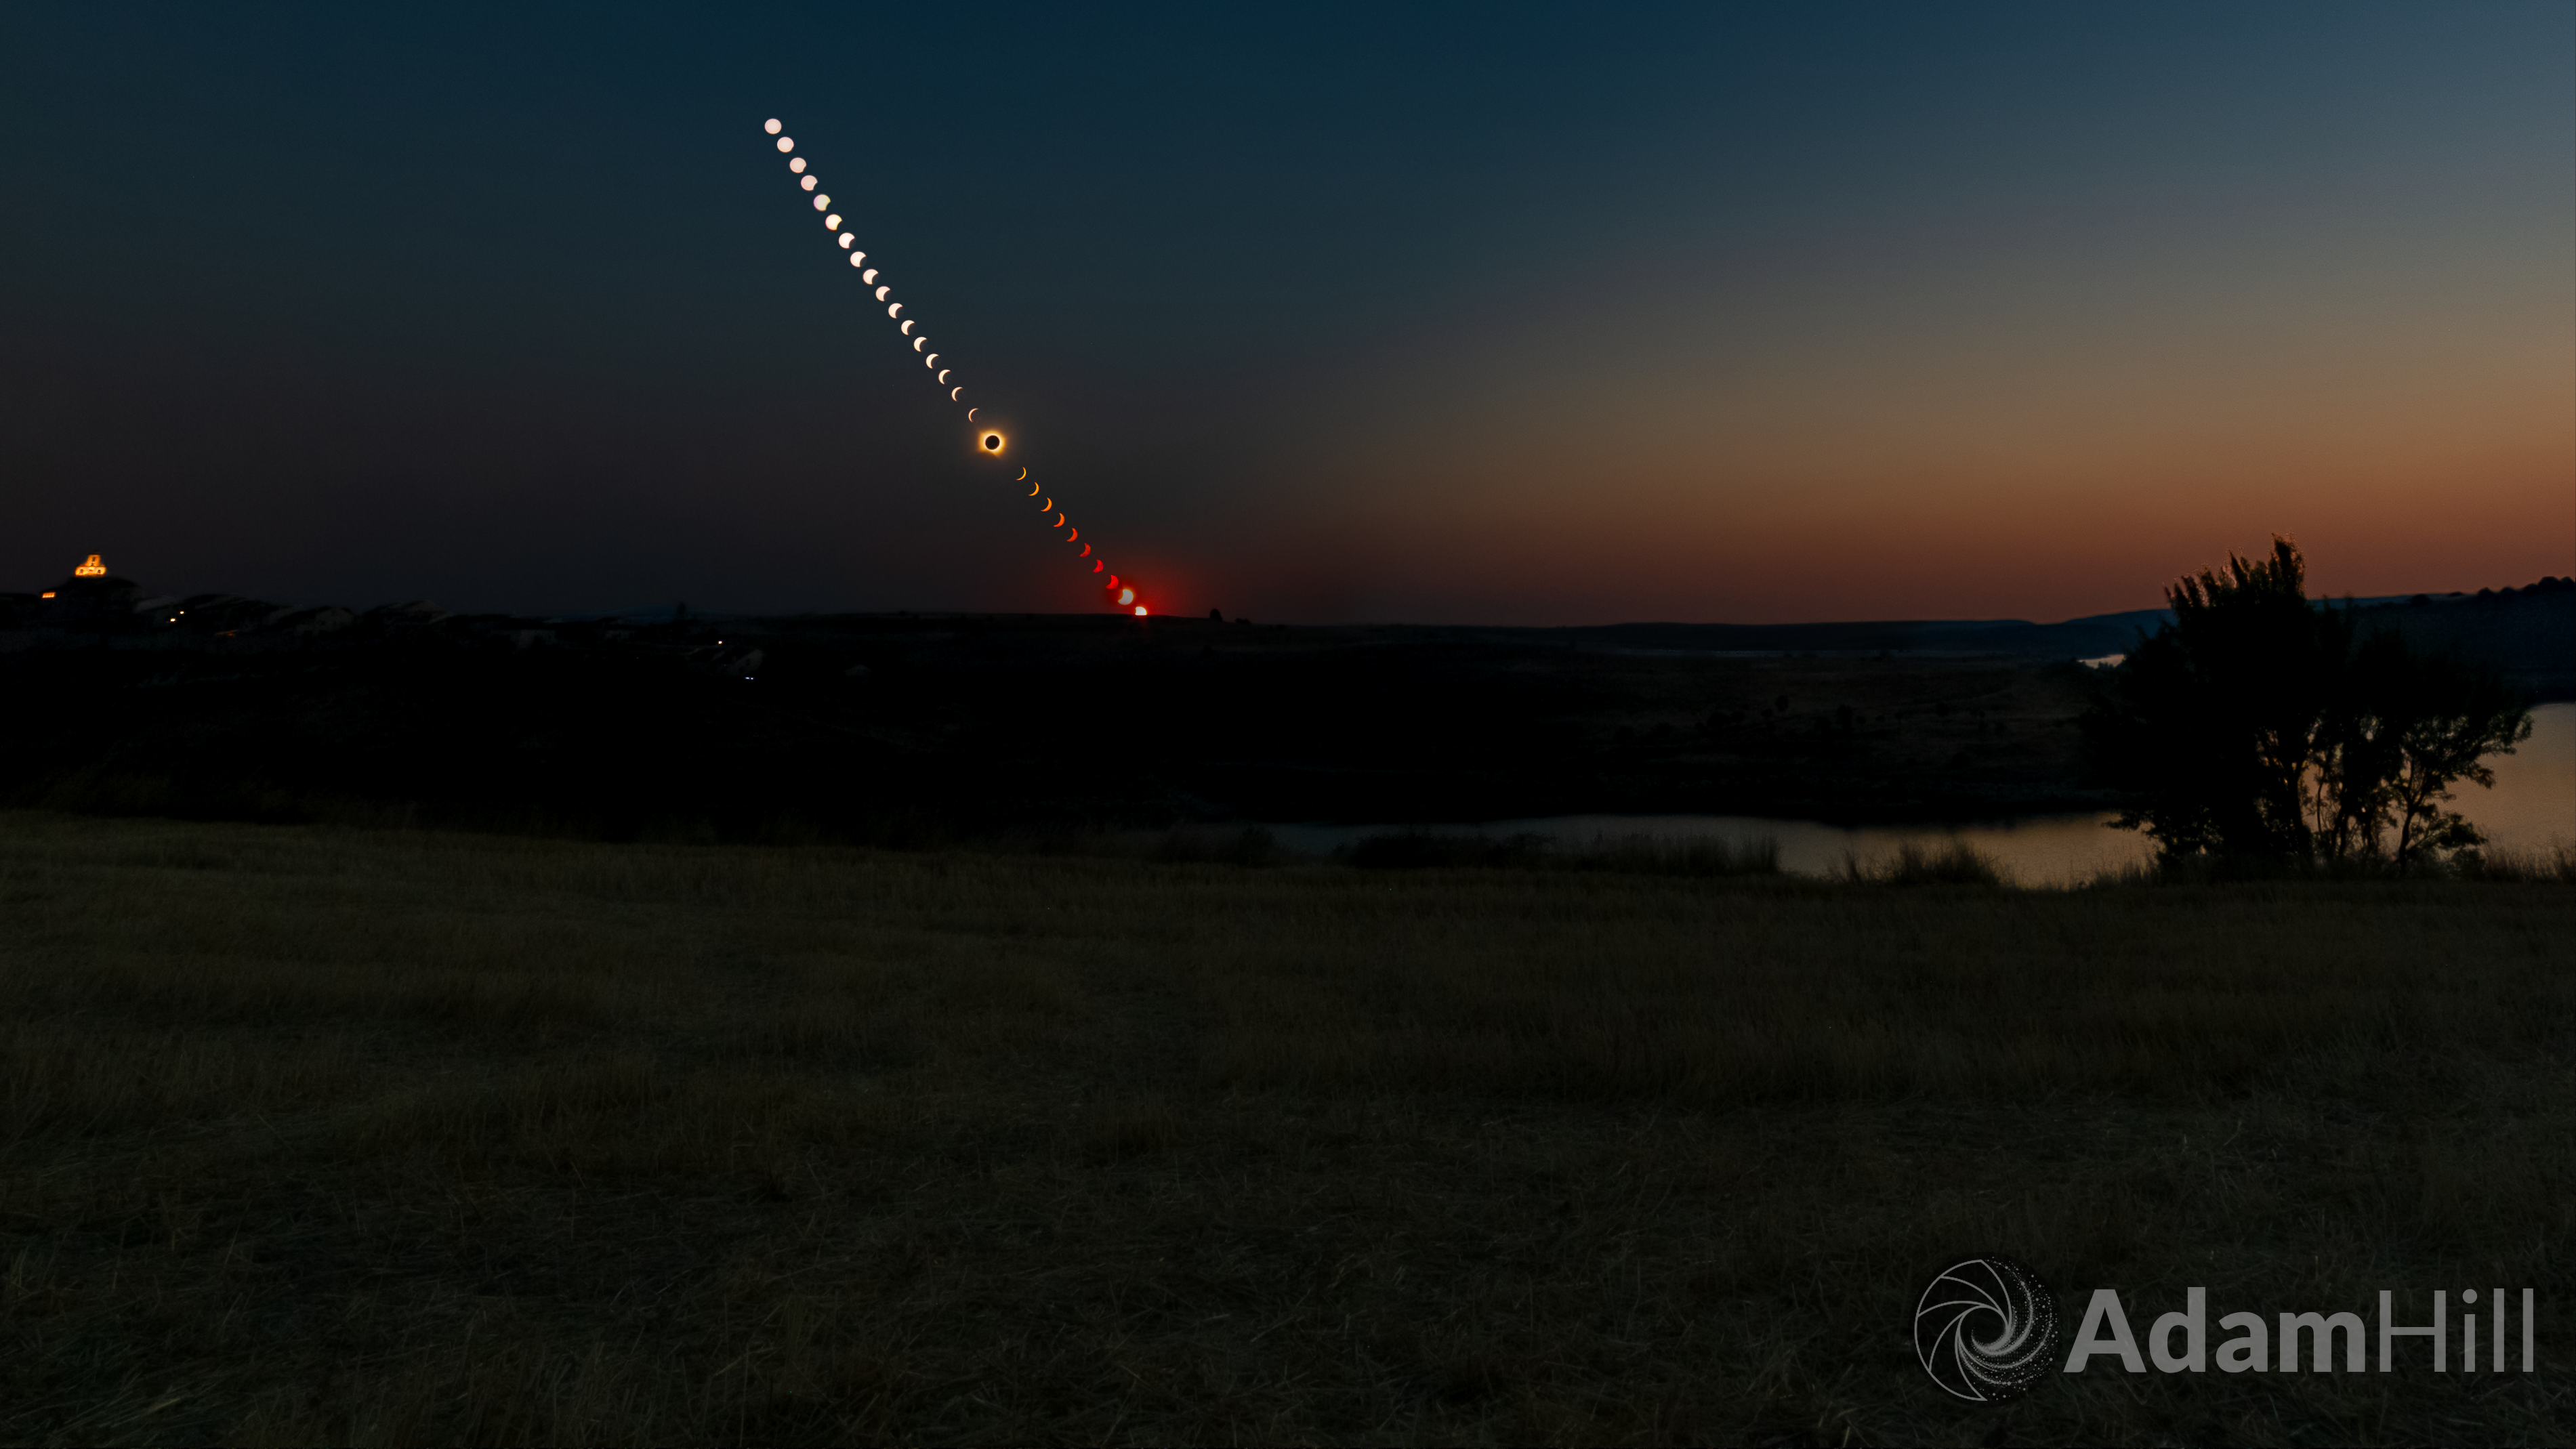
To paraphrase the old saying: “No plan survives second contact with the solar limb”. In astrophotography, and especially the insane time-constraint of solar eclipse photography, you can prepare all you want but nothing is guaranteed during totality.
For months leading up to August 2026, the eclipse existed in my mind as a collection of orbital parameters, angular elevations, and carefully calculated exposure ladders. An obscuration of 100% and a fleeting window of one minute and forty seconds of totality hanging tantalisingly low over the northern Spanish plains.
Yet, as any veteran of experimental physics and solar eclipse trips will tell you nature and firmware rarely consult your schedule.
“Seeing a partial eclipse bears the same relation to seeing a total eclipse as kissing a man does to marrying him, or being on the beach does to being on the moon.”
— Annie Dillard, Total Eclipse (1982)
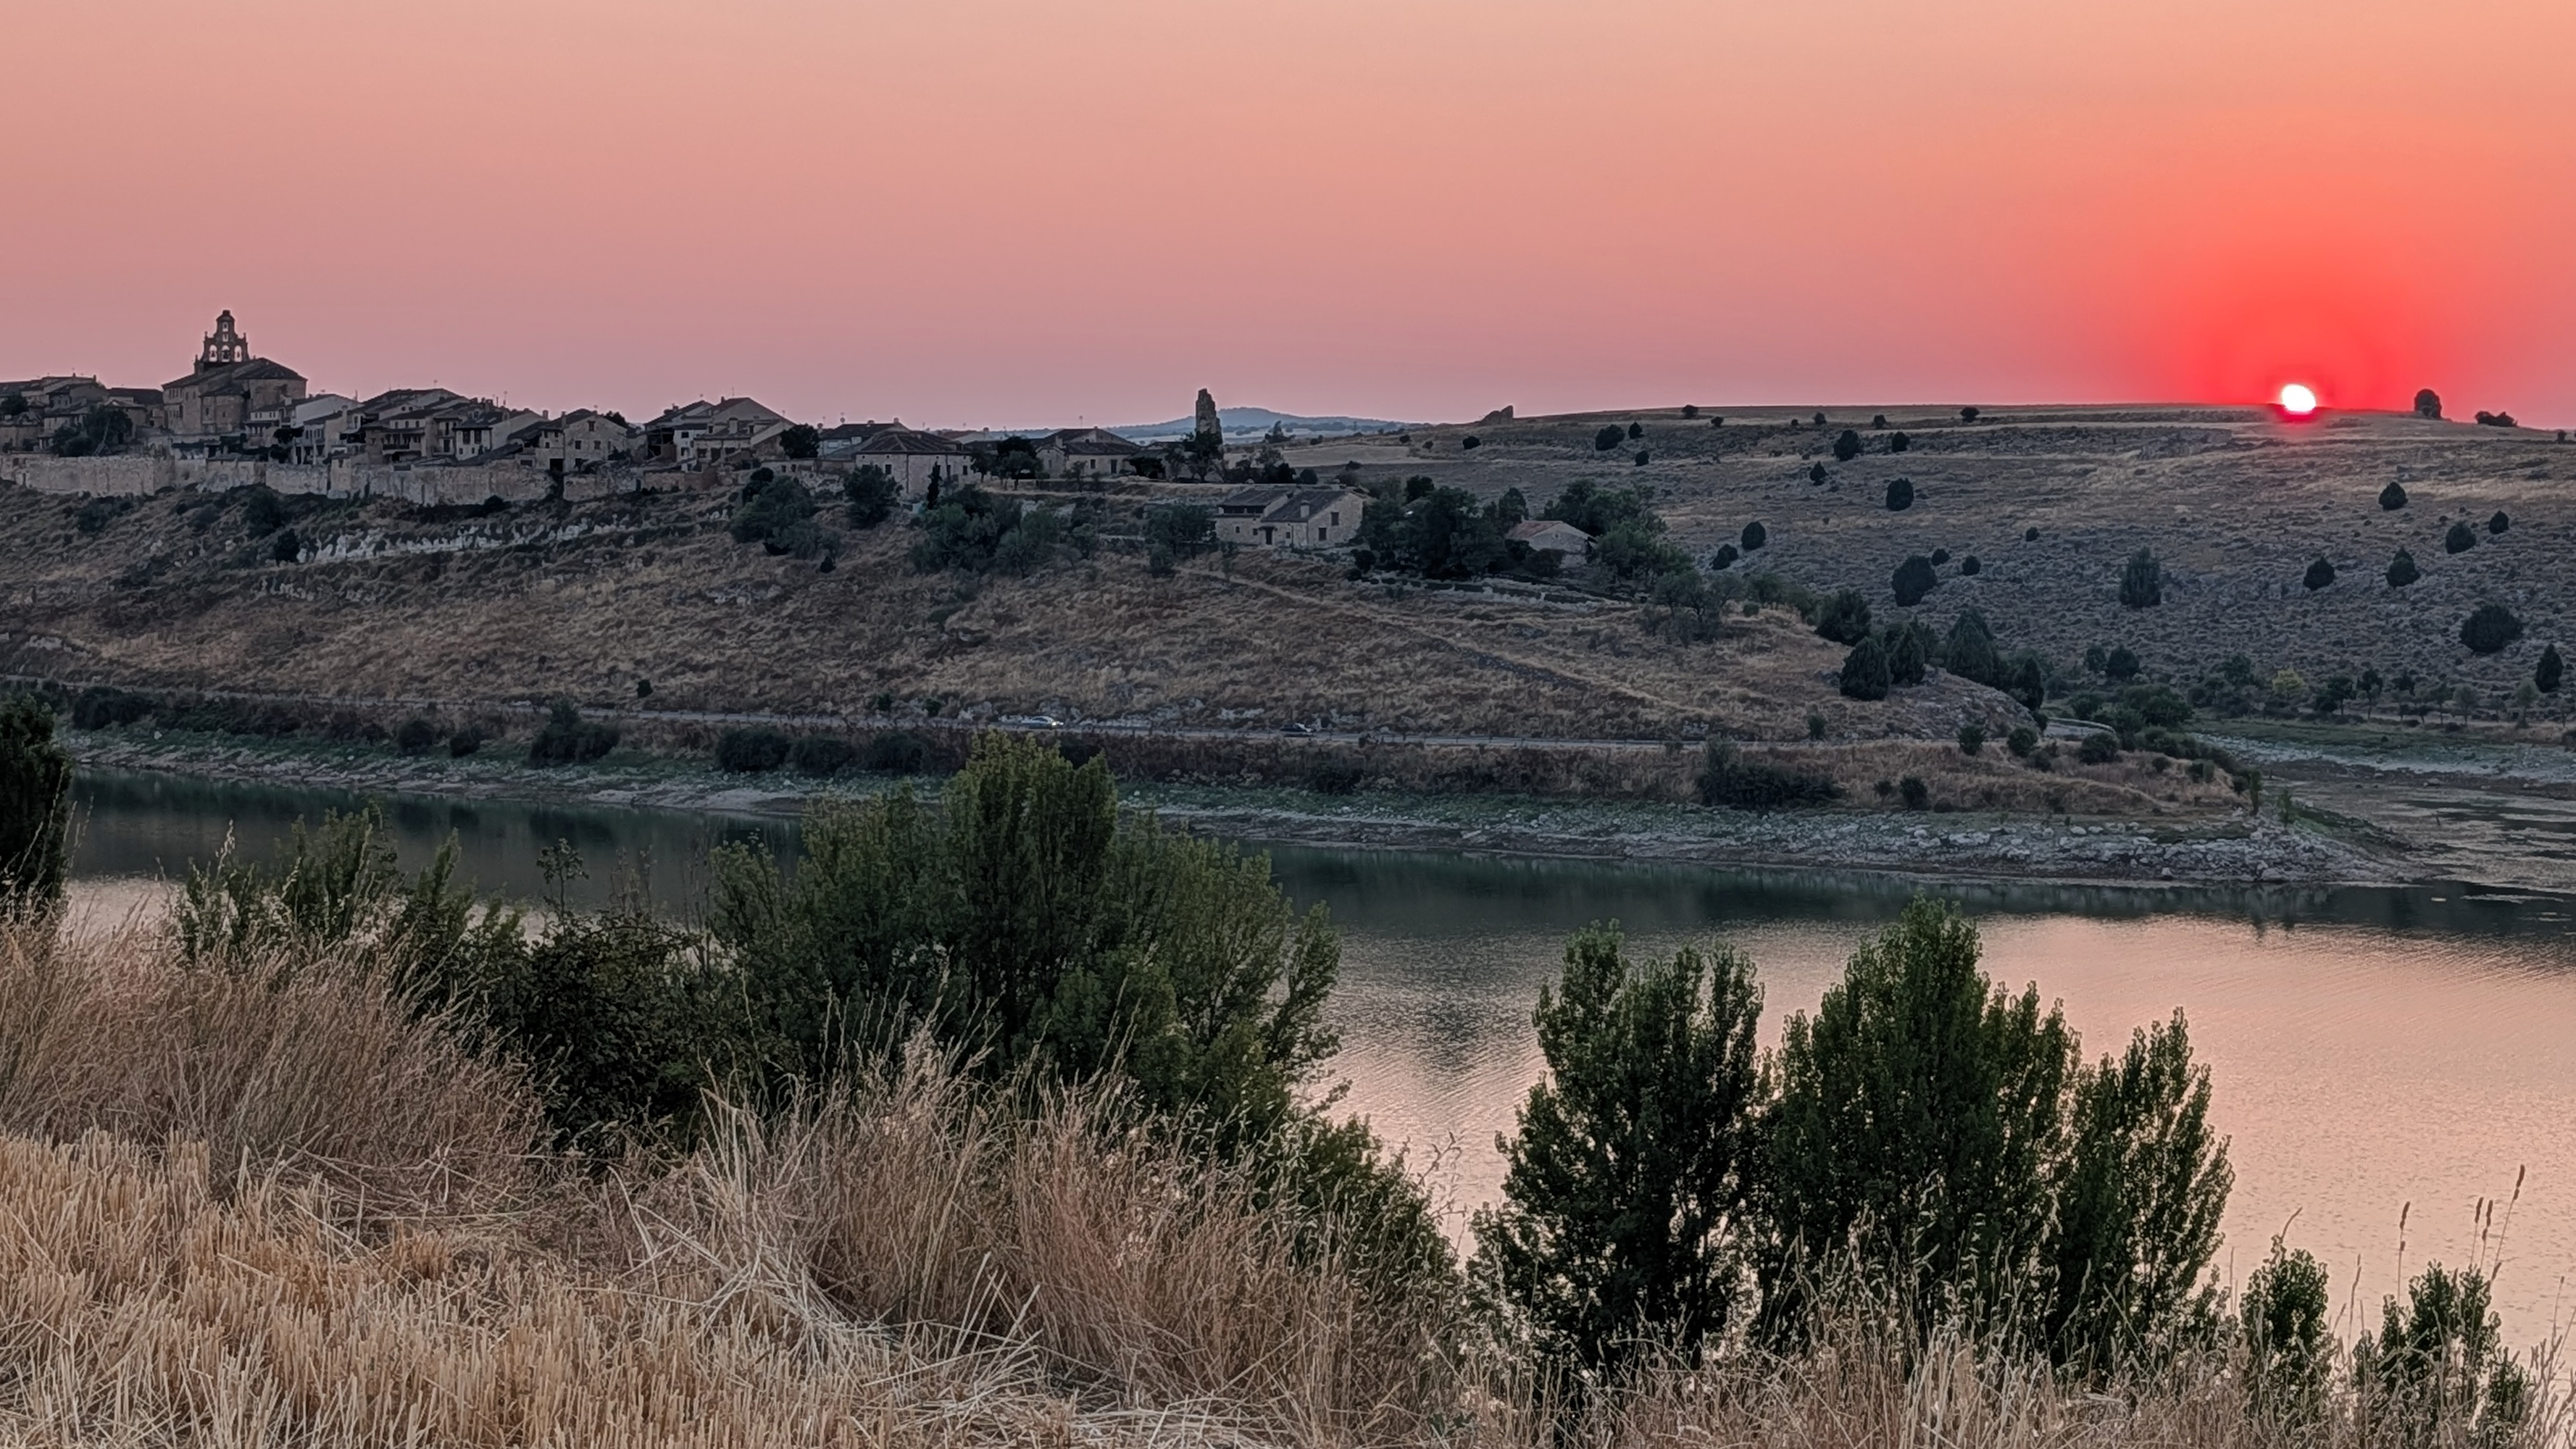
Standing on the arid, dusty banks of the reservoir of Linares del Arroyo, looking across the water at the ancient stone ramparts of Maderuelo, the clean theory evaporated into the golden Spanish dusk. This is the story of how I captured the full celestial trajectory of the 2026 eclipse on an ultra-wide lens, wrestled with intervalometers, and pieced together a multi-exposure composite in Adobe Lightroom and Photoshop.
The Stage: Maderuelo and Capitulo Trece
If you were to invent a film set for a low-horizon solar event, you would struggle to beat Maderuelo. Perched on an elevated limestone ridge in the province of Segovia, the village is an almost intact relic of twelfth-century Castile: narrow cobbled alleyways, Romanesque stone archways, and ancient church bells that look out across the valley.
We based ourselves at Capítulo Trece, an idyllic, historic hotel tucked into the medieval village walls. While the temptation was strong to set up tripods right in the village, or simply watch from our hotel room balcony with a glass of Ribera del Duero in hand, the geometry of an eclipse setting into the west demanded distance.
After scouting the vicinity the preceding day, we set up camp across the reservoir waters at approximate coordinates:
From this vantage point, looking south-west back towards the village, the low-altitude trajectory of the sun would arc across the sky over the medieval architecture and plunge toward totality before setting behind the hills.
| Parameter | Local Ephemeris (CEST) | Notes |
|---|---|---|
| Partial Begins (C₁) | 19:34:53 | Sun at ≈ 18° altitude |
| Totality Begins (C₂) | 20:29:48 | Sudden drop in ambient light and temperature |
| Maximum Eclipse | 20:30:38 | Moon perfectly centred; corona at peak extension |
| Totality Ends (C₃) | 20:31:28 | Duration: 1m 40s (100 seconds) |
| Sunset | 21:17:44 | Solar disc dips below the Spanish horizon |
| Partial Ends (C₄) | Sun below horizon | Final egress obscured by topography |
The Tale of Two Rigs: Ultra-Wide vs The 600mm Zoom
Astrophotographers heading into totality face an immediate identity crisis: do you shoot telephoto close-ups of solar prominences dancing off the limb, or do you capture the landscape as the world plunges into twilight?
Naturally, I chose the only sensible answer: both.
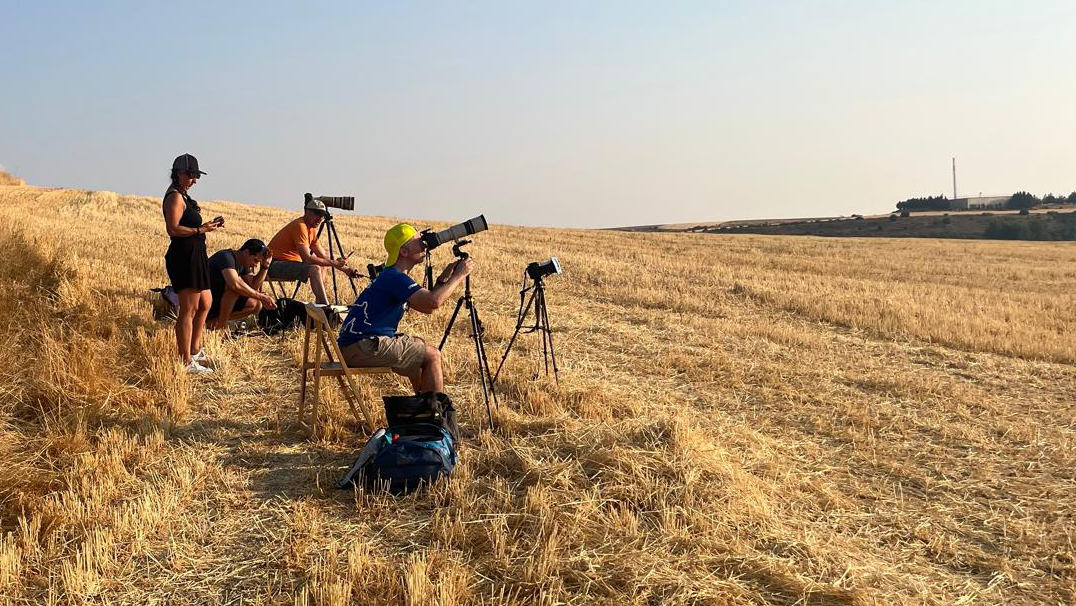
I ran a dual setup:
The Close-Up Behemoth: A Canon EOS R6 Mark II paired with an EF 300mm f/4L lens, coupled with a 2x EF teleconverter and an EF-to-RF mount adapter. This gave an effective focal length of 600mm to resolve the fine structure of coronal streamers and chromosphere beads. (The saga of processing hundreds of high-magnification RAW frames from this rig is a tale for another day).
The Landscape Composite Workhorse: A full-frame Canon 6D mounted with a fully manual Rokinon 14mm f/2.8 ultra-wide-angle lens.
The goal for the 14mm rig was to build an all-in-one composite image: anchoring the entire 1.5-hour ingress and egress journey along its trajectory across the sky, with the crown jewel, the expanded corona during the 100 seconds of totality, sitting proudly over Maderuelo.
The Hardware Battle: Baader Film & Bulbous Elements
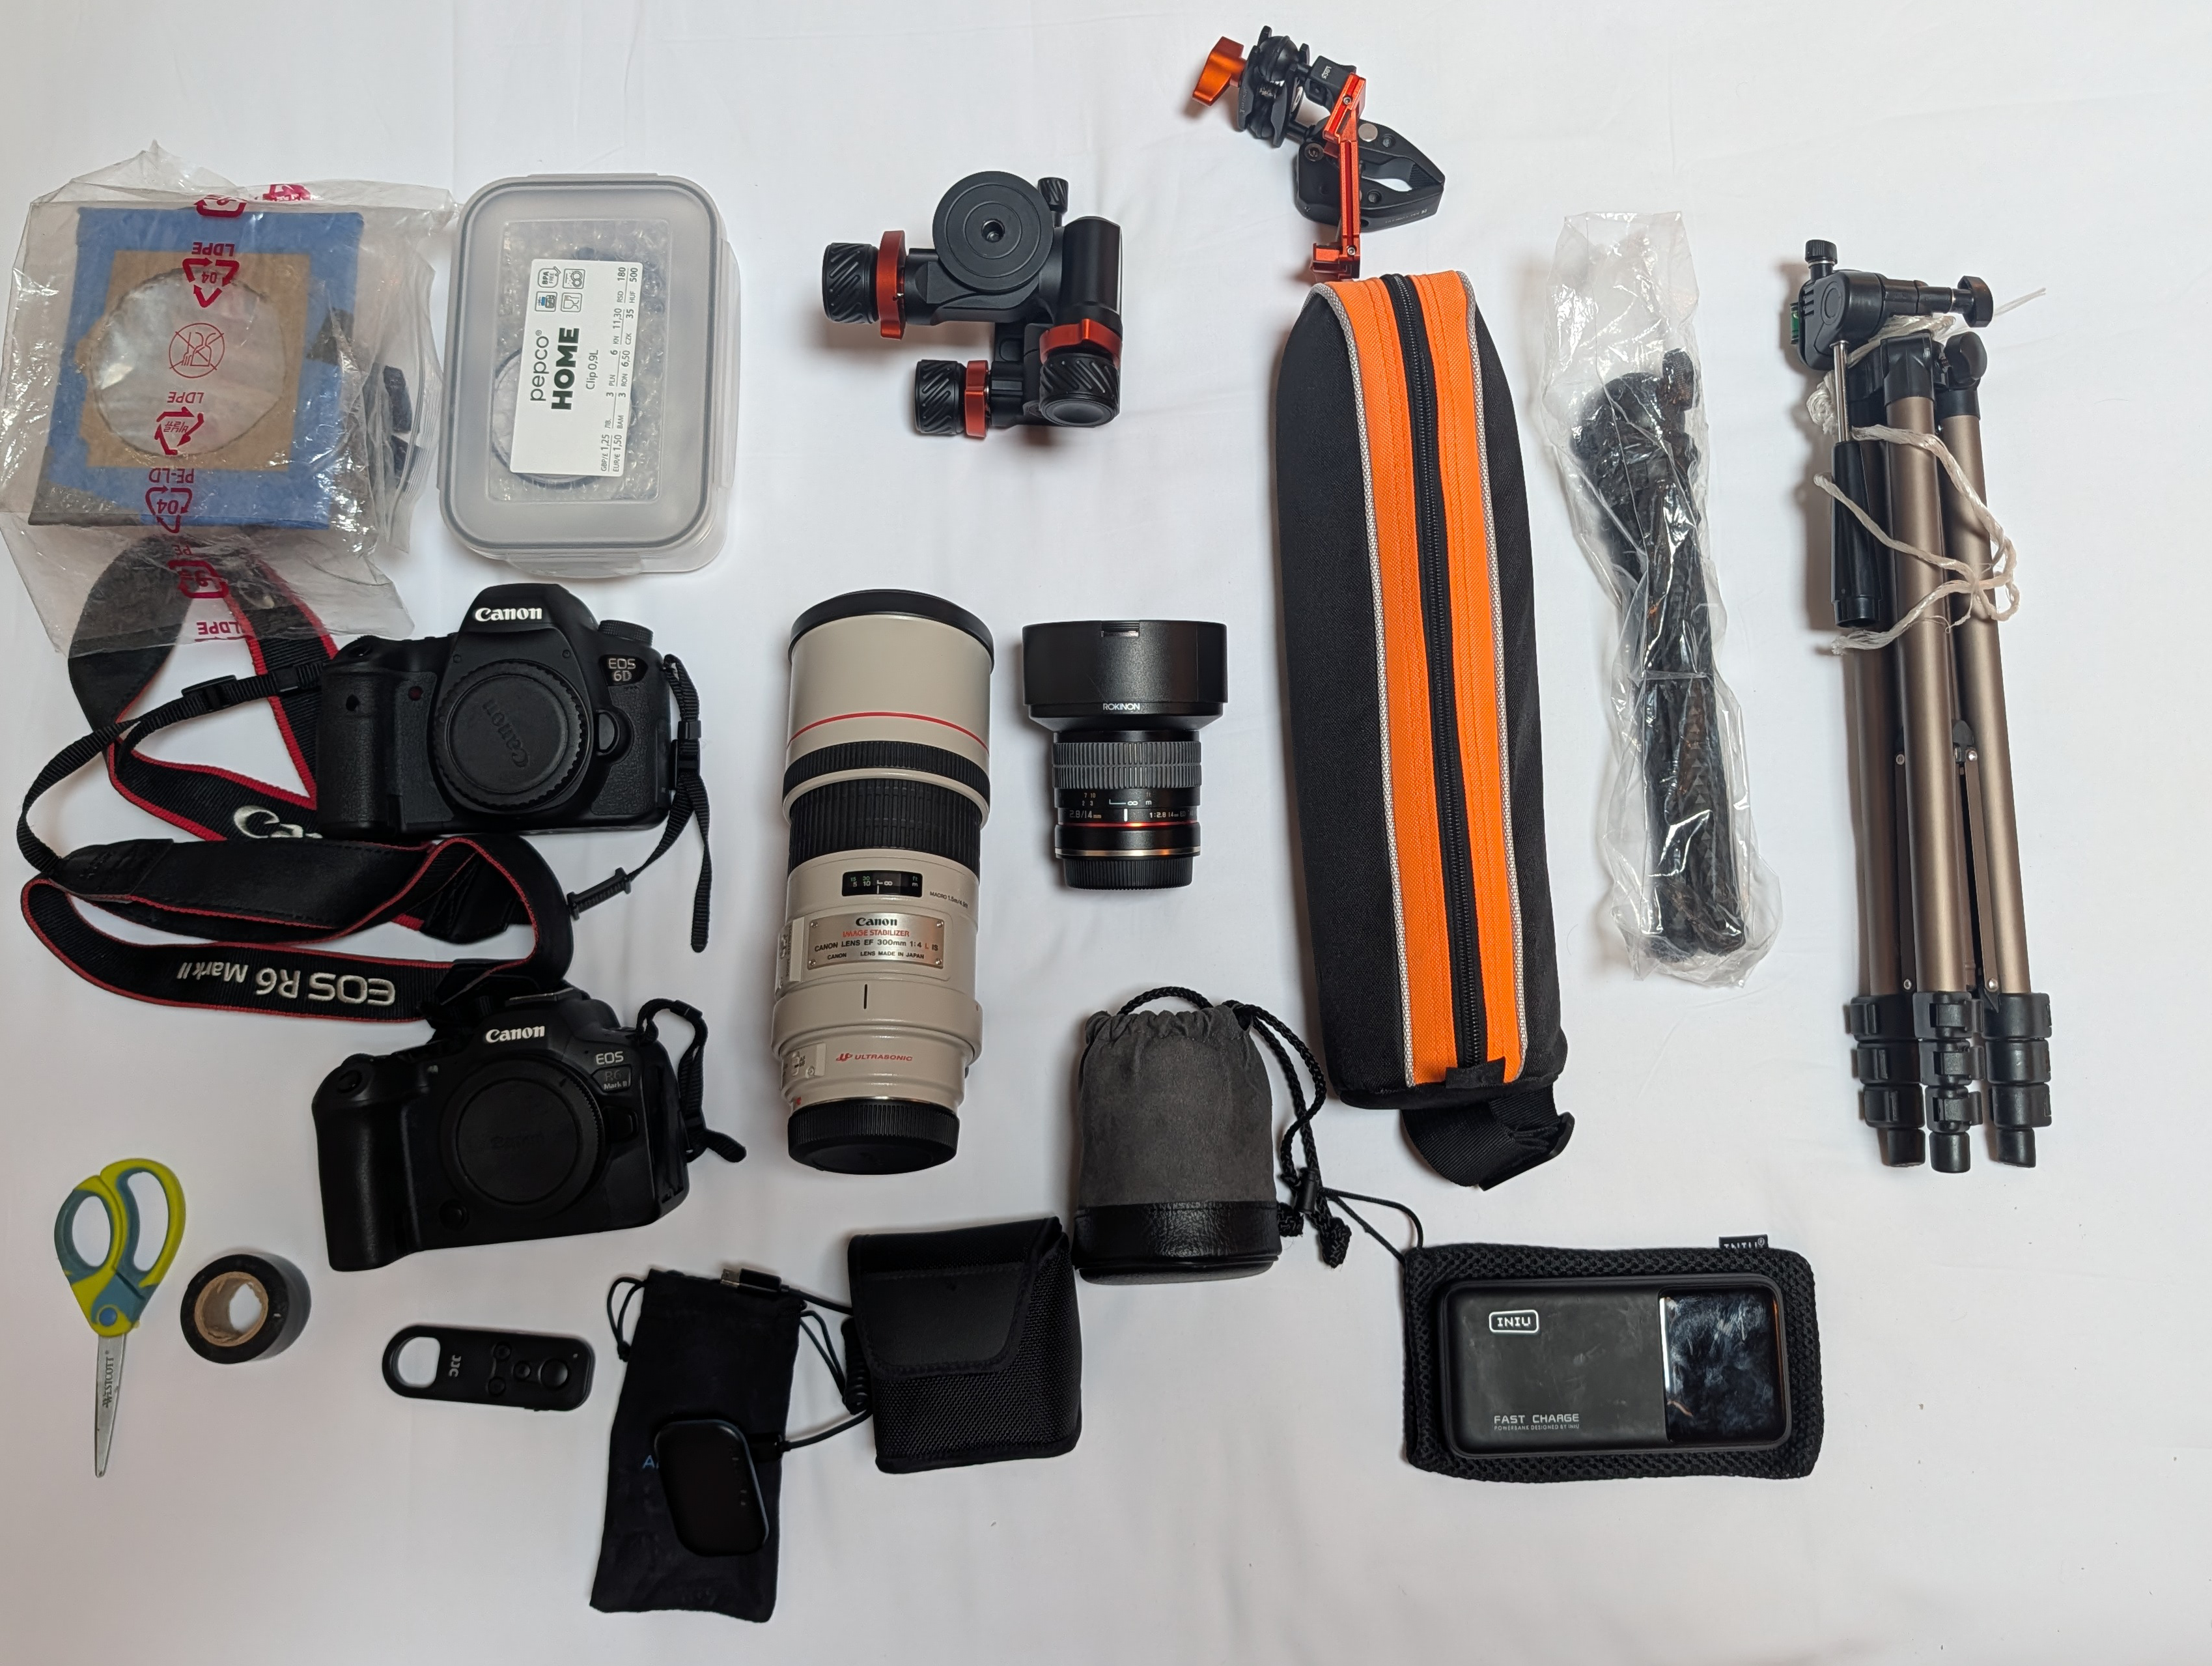
To photograph the partial phases of a solar eclipse without turning your camera’s CMOS sensor into a melted piece of silicon, you need serious attenuation. I used optical Baader Solar Safety Film (ND 5.0), which reduces incident solar radiation by a factor of 105 (roughly 16.6 stops).
On a telephoto lens, mounting a filter is trivial. On an ultra-wide Rokinon 14mm, it is an optical nightmare.
The lens features an enormous, bulbous front element with an integrated, non-removable petal lens hood. There are no front filter threads. Fabricating a DIY filter collar out of cardboard and heavy-duty gaffer tape that fits snugly over the petal hood without tearing the delicate Baader foil, and without casting severe vignetting onto the ultra-wide field of view, took a bit of preparation work back at the hotel.
Worse still, ultra-wide curved optics are notoriously susceptible to internal reflections. When direct sunlight enters an extreme curvature through an imperfect flat filter plane, internal bounce is inevitable. As we will see, a few ingress frames suffered from phantom green and white flares that had to be addressed in post-production.
The Intervalometer Betrayal
With the 6D locked down on a low-profile tripod, the plan was simple and methodical:
- Fire an exposure every 60 seconds throughout the eclipse.
- Program a 5-frame exposure bracket around 1/500s at f/8 and ISO 400.
The bracketing was intended as insurance: as the sun descended towards the horizon, Rayleigh scattering and atmospheric extinction would inevitably eat away at the light. Having a bracketed spread would ensure I never lost the solar disc to underexposure.
I hit start on the external hardware intervalometer, confirmed the cadence, and turned my attention to the 600mm rig to manage tracking.
Except, somewhere inside the firmware handshake between the camera body and the third-party timer, the custom camera settings threw a quiet fit. The intervalometer was triggering the shutter every minute, but it had silently cancelled the bracketing sequence.
Instead of an automated 5-frame exposure ladder, the camera was firing five stubbornly fixed exposures of 1/500s every sixty seconds. Click, click, click, click, click. Pause. Click, click, click, click, click. Pause.
I had no idea this was happening until I downloaded all of the images onto my laptop after the fact.
The 100 seconds of Castile Twilight
At 20:29:48 CEST, the last sliver of the solar crescent shrank to a point, flared into a brilliant diamond ring, and vanished.
“Then out upon the darkness, gruesome but sublime, flashes the glory of the incomparable corona, a silvery, soft, unearthly light, with radiant streamers, stretching at times millions of uncomprehended miles into space, while the rosy protuberances skirt the black rim of the moon in ethereal splendour.”
— Mabel Loomis Todd, Total Eclipses of the Sun (1894)
The incoming shadow had been preceded by a noticeable, and welcome, drop in the baking heatwave temperature. The light did not dim like an ordinary sunset; it assumed an eerie, mystical quality. Across the water, the warm floodlights of the Maderuelo church flickered to life, illuminating the church bells in sharp relief against a deep indigo sky.
This was the cue. Solar filter whipped off the lens. Shutter switched from automated intervalometer to pre-programmed totality brackets.
Totality presents one of the most extreme dynamic range challenges in photography. The inner corona, dancing prominences, and Baily’s Beads are brilliantly bright, while the delicate outer magnetic streamers fade into the ambient twilight. No single exposure can capture both.
Over the next 90 seconds, while taking in the visual awe of the black sun and bright red prominences with my own eyes, I fired a manual 7-shot bracket on the 6D at 1.3 EV increments, centered on 1/30s at f/8, ISO 400: 1/500s, 1/200s, 1/80s, 1/30s, 1/13s, 1/5s, & 1/2s.
The longest exposures soaked up the deep twilight glow over the reservoir and the illumination on the medieval church tower. The shortest held the delicate boundary of the lunar disc.
And then, just as quickly, the western edge flared. Third contact arrived. The filter went back on, and the intervalometer resumed its relentless cadence.
Egress & The 14-Bit Miracle
It was during egress that the missed bracketing almost ruined the day.
As the moon slid off the solar disc, the Sun was dropping rapidly towards the western horizon. By 21:00 CEST, it was sinking into the dense atmospheric layer just above the hills. Atmospheric extinction was increasing exponentially, scattering blue wavelengths and severely attenuating the total luminous flux.
Because my intervalometer was still blindly shooting 1/500s through an ND 5.0 filter, the solar disc grew dimmer and dimmer with each exposure. By frame eight of egress, it had degraded into a faint smudge.
Fortunately, I had planned to gamble on the final phase at sunset without the filter, hoping to capture the natural hues of the setting, partially eclipsed Sun. For the final 10 minutes of the eclipse, I was shooting sans-filter again. Pointing the bare sensor towards the horizon through the thick natural filter of Spain’s evening haze yielded two rich, red crescents just kissing the ridgeline.
Back at Capítulo Trece that evening, the filtered egress files initially looked catastrophic: an array of underexposed black rectangles. But here is where modern digital sensors earn their keep. Because the Canon 6D captures uncompressed 14-bit RAW data, the signal was buried down in the lowest code values, but it had not clipped into pure oblivion. Pushing exposure by +3.5 to +4.5 EV in Adobe Lightroom and adjusting the black point lifted the solar crescent cleanly out of the noise floor. It was hardly textbook technique, but the data was saved.
Assembling the Composite in Adobe Photoshop
With a drive full of RAW files, the final challenge was building a coherent composite image that was astronomically authentic yet graphically readable.
1. Frame Selection and the 3-Minute Cadence
Although I had captured five frames every 60 seconds (giving over 450 partial phase images), stacking all of them on a single 14mm wide-angle canvas created an impenetrable, overlapping smear of white discs. The angular diameter of the sun on a 14mm lens is small (roughly 0.5°, occupying only a tiny cluster of pixels), but at 1-minute intervals, the discs merged together.
I thinned the herd: selecting 17 ingress photos and 10 egress photos spaced approximately 3 minutes apart. This cadence provided enough breathing space to clearly reveal the progressive bite of the lunar shadow without visual clutter.
Composite Sequence Breakdown:
├── Base Layer: Lightroom 7 bracketed frames HDR merged (1/500s to 0.5s) twilight landscape plate (church tower & village bells)
├── Ingress Trail: 17 frames @ 3-min intervals (f/8, 1/500s, Baader filter)
├── Totality Stack: 7 HDR bracketed frames (1/500s to 0.5s blended via luminosity masks)
└── Egress Trail: 10 frames @ 3-min intervals (Frames 1-8 recovered RAW, 9-10 unfiltered)
2. Raw Calibration & White Balance
All RAW files were imported into Lightroom. Because it was a cloudless Castilian summer day, I maintained the “As Shot” white balance across the entire sequence, ~5400K, to retain the natural warmth of the Iberian golden hour.
For the ingress frames, chromatic aberration corrections specific to the Rokinon 14mm profile were enabled to eliminate magenta fringing along the moon’s dark limb.
3. Eradicating Internal Reflections
During ingress, the bulbous lens element had bounced bright solar light between internal elements, leaving faint greenish artefacts across three frames.
In Photoshop, each affected solar disc layer was isolated using a tight layer mask. A high-pass filter pass combined with a selective Clone Stamp layer set to Color mode neutralised the green flare, restoring the clean indigo gradient of the sky around the disc.
4. The Totality HDR Blend
To construct the central totality crown:
- The 7 bracketed exposures were stacked as separate layers in Photoshop.
- The 0.5s exposure served as the base for the foreground landscape and outer coronal streamers.
- Successively shorter exposures (1/5s, 1/30s, 1/200s) were blended in using Luminosity Masks.
- The 1/500s exposure sat at the top of the stack, masked to reveal only the razor-sharp edge of the lunar silhouette and the vivid pink prominence beads peeking over the rim.
5. Canvas Compositing & Blend Modes
Because the camera remained bolted to the tripod throughout the event, the sun’s trajectory was geometrically locked to the landscape.
The base landscape plate was selected from the end of totality capturing the warm village streetlights reflected in the calm waters of the reservoir.
Each selected solar phase was extracted onto its own layer.
Setting the blending mode of each solar disc layer to Lighten or Screen allowed the bright discs to naturally punch through the twilight sky without altering the background gradient.
Final global adjustments were applied using an adjustment layer with a gentle S-curve in Curves and a conservative boost in Vibrance (+12) to match the vivid, golden-to-indigo gradient our eyes registered during the final minutes before sunset.
Final Thoughts: The Astrophotographer’s Paradox
Every time I return from an eclipse expedition, I am struck by the inherent contradiction of the craft.
We travel thousands of miles, pack dozens of kilograms of optical glass, fabricate custom filter brackets in hotel rooms, and spend hours diagnosing intervalometer quirks, all to record an event that lasts less time than it takes to boil an egg.
Yet, when I stood across the reservoir at Maderuelo, watching the Iberian landscape drain of colour in the twilight of an artificial dusk, I remembered why we do it. The camera captures the photons, but the human memory captures the sheer, irrational wonder of it all. And while this isn’t my first solar eclipse rodeo, it was still a first for me; I’ve never seen an eclipse so low to the horizon with wildfire-infused yellow corona and huge bright red prominences. It may have been a shorter eclipse, but it was the most colourful I’ve experienced and one I will never forget.
“I did not see the eclipse, being too busy changing plates, except for one glance to make sure the eclipse had begun and another half-way through to see how much cloud there was.”
— Arthur Stanley Eddington, Expedition to Príncipe (Reported in The Observatory, 1919)
Equipment Summary
- Wide-angle Rig: Canon EOS 6D, Rokinon 14mm f/2.8 IF ED UMC,
- Solar filter (homemade): Baader Solar Safety Film (ND 5.0).
- Processing Software: Adobe Lightroom Classic & Adobe Photoshop CC.
Enjoyed this post?
Share it with your colleagues, network, or friends: